Unlocking the Mystery of Homemade Magic Shell: Your Guide to Perfect Hardening
Remember that satisfying crack as your spoon broke through a chocolate-covered ice cream cone? Or the mesmerizing way a drizzle of chocolate instantly solidified on your sundae, creating a crisp, delicious shell? That, my friends, is the magic of homemade magic shell. For years, this delightful confection seemed like something only found in store-bought squeeze bottles or at your local ice cream parlor. But what if we told you that creating this culinary marvel at home is not only incredibly simple but also offers a superior taste experience and endless customization possibilities?
Making your own magic shell is surprisingly easy, requiring just a few key ingredients and a dash of understanding about how they interact. Forget the additives and preservatives of commercial versions; your kitchen can become a wonderland of perfectly hard, intensely chocolatey coatings. This comprehensive guide will delve into the secrets behind its magical hardening, explore essential ingredients, provide step-by-step instructions, and offer expert tips to ensure your homemade chocolate shell is nothing short of spectacular.
The Scientific Secret Behind the Shell: Why it Hardens Like Magic
The "magic" in magic shell isn't really magic at all; it's pure food science, and the unsung hero of this process is coconut oil. Unlike many other fats, coconut oil has a relatively low melting point, typically around 76°F (24°C). This means it's often solid at room temperature or slightly above, but melts very easily when warmed.
Here's how the enchantment unfolds:
- Melting Point Difference: When you combine chocolate (which has a higher melting point, usually above 90°F/32°C) with coconut oil and heat them, the mixture becomes a smooth, fluid liquid.
- Rapid Solidification: The moment this warm, liquid chocolate mixture comes into contact with something cold – like a scoop of ice cream, a frozen banana, or even a chilled piece of fruit – the temperature of the coconut oil plummets below its solidification point.
- Instant Crunch: As the coconut oil rapidly solidifies, it forces the chocolate solids to crystalize and firm up alongside it, creating that distinctive, satisfyingly crisp, and brittle shell. The quick change from liquid to solid is what gives homemade chocolate shell its unique texture and charm.
Understanding this crucial role of coconut oil is the first step to mastering your homemade magic shell. The ratio of coconut oil to chocolate is vital, as it dictates how quickly and how hard your shell will set.
Crafting Your Own Chocolate Magic Shell: Ingredients & Variations
While the fundamental duo of chocolate and coconut oil forms the backbone of any magic shell recipe, there's ample room for customization and enhancement. Here's a breakdown of the ingredients:
Essential Ingredients: The Core Duo
- Chocolate:
- Type: You have a world of choices here. Bittersweet or dark chocolate chips (like 60-70% cacao) are excellent for a rich, intense flavor that isn't overly sweet. Milk chocolate can be used for a sweeter, creamier shell, but you might need to slightly adjust the coconut oil ratio as milk chocolate often contains more fat. Chocolate bars, chopped into small pieces, also work beautifully and often offer higher quality chocolate.
- Quality Matters: Using good quality chocolate will undoubtedly elevate the flavor of your magic shell.
- Quantity: Recipes typically call for about 1 cup (8 oz / 225 grams) of chocolate chips or chopped chocolate.
- Coconut Oil:
- Refined vs. Unrefined: Unrefined (virgin) coconut oil retains a distinct coconut flavor and aroma, which can be delightful if you enjoy that tropical note. Refined coconut oil, on the other hand, is flavorless and odorless, making it a versatile choice if you want the pure chocolate taste to shine through. Both work equally well for hardening purposes.
- Quantity: This is where recipes can vary, influencing the shell's texture and hardness. A common starting point is 2 tablespoons for 1 cup of chocolate. Some recipes might use more, up to 3/4 cup for 1 cup of chocolate, especially if adding other dry ingredients like powdered sugar. Experimentation is key to finding your preferred consistency.
Elevating Your Shell: Optional Flavor Enhancers
Beyond the core two, several ingredients can transform your homemade chocolate shell into a gourmet delight:
- Sea Salt: A pinch (e.g., 1/2 teaspoon Celtic sea salt) can dramatically enhance the chocolate flavor, providing a pleasant contrast and depth. It really brings out the cocoa notes.
- Espresso Powder: Don't worry, it won't make your chocolate taste like coffee! A small amount (e.g., 1/2 teaspoon) of instant espresso or coffee powder deepens and intensifies the chocolate flavor, making it richer and more complex. It's a secret ingredient many chocolatiers use.
- Pure Vanilla Extract: Just like in baking, vanilla (e.g., 1/2 teaspoon) adds a wonderful aromatic warmth and rounds out the chocolate's profile.
- Powdered Sugar (Confectioners' Sugar): Some recipes, particularly those aiming for an even smoother, slightly sweeter finish, incorporate powdered sugar (e.g., 1/2 cup). This can aid in achieving a silky texture and can subtly affect the hardening, sometimes requiring a slight adjustment to the coconut oil ratio. It's a great addition if you prefer a sweeter shell or are using very dark chocolate.
- Other Flavorings: Get creative! A drop of mint extract, a hint of orange zest, a pinch of chili powder for a Mexican hot chocolate twist, or even a dash of almond extract can lead to exciting variations.
For a detailed comparison of common magic shell recipes, including the popular 3-ingredient versus 5-ingredient versions, check out our article: Homemade Magic Shell: Compare 3-Ingredient vs. 5-Ingredient Recipes.
Mastering the Method: Step-by-Step Instructions for Flawless Shell
The process of making homemade magic shell is incredibly straightforward, often touted as easy enough for an 8-year-old. The key is gentle melting and proper cooling.
Melting Techniques: Double Boiler vs. Microwave
Both methods are effective, choose the one you're most comfortable with.
Double Boiler Method (Recommended for control):
- Prepare Your Setup: Find a large, heat-proof glass or metal bowl that can sit snugly over a pot without touching the simmering water below.
- Simmer Water: Fill the pot with an inch or two of water and bring it to a gentle simmer over medium-low heat.
- Combine Ingredients: In the glass bowl, combine your chocolate (chopped or chips) and coconut oil. If using, add sea salt and espresso powder now. Vanilla extract is typically stirred in at the end.
- Melt Gently: Place the bowl over the simmering water, ensuring no water or steam can get into the chocolate (even a tiny drop can cause it to seize). Stir continuously with a rubber spatula or whisk until the chocolate and coconut oil are completely melted and smooth. This process usually takes 5-10 minutes.
- Remove and Stir: Once fully melted and smooth, remove the bowl from the heat. Stir in any vanilla extract.
Microwave Method (Quick and convenient):
- Combine Ingredients: In a microwave-safe glass bowl, combine your chocolate (chopped or chips) and coconut oil. If using, add sea salt and espresso powder now.
- Heat in Intervals: Microwave on medium power (50-70%) for 30-second intervals, stirring thoroughly after each interval. This prevents scorching the chocolate.
- Melt Until Smooth: Continue microwaving and stirring until the mixture is completely melted and smooth. This typically takes 1-2 minutes total, depending on your microwave's power. Stir in any vanilla extract at the end.
Cooling and Application: The Final Touches
Once your homemade magic shell is smooth and combined, there are a couple of crucial steps:
- Cool Before Dipping: It's important to let the mixture cool slightly before using it. If it's too hot, it can melt your ice cream. Allow it to cool for 10-15 minutes at room temperature until it's warm but not piping hot. It should still be liquid and pourable.
- Application:
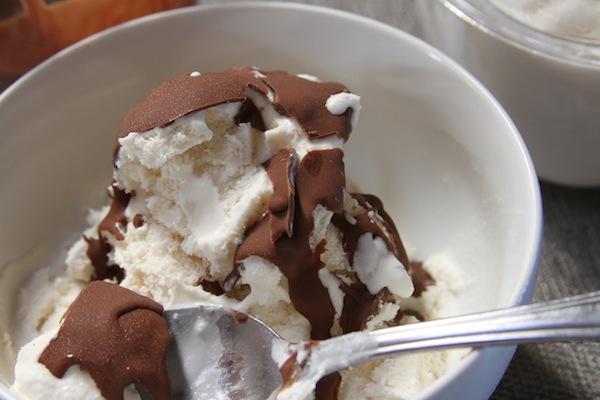
- Drizzle: For sundaes, simply drizzle the liquid magic shell generously over your cold ice cream.
- Dip: For cones or frozen treats like bananas, hold them upside down and dip them directly into the magic shell, allowing any excess to drip off.
- Watch the Magic Happen: Within 10-20 seconds of contact with the cold surface, you'll see your chocolate shell harden into a beautiful, crisp coating.
Troubleshooting Your Magic Shell: Common Pitfalls and Solutions
Even though it's simple, sometimes things don't go exactly as planned. Here are some common issues and how to fix them:
- My shell isn't hardening or is too soft:
- Solution: The most common culprit is too little coconut oil or insufficient contact with a truly cold surface. Ensure your ice cream is well-frozen. If the shell is still too soft, gently reheat the mixture and stir in another 1/2 to 1 tablespoon of coconut oil.
- My shell is grainy or seized:
- Solution: This usually happens due to overheating the chocolate, or if even a tiny amount of water got into the mixture. If it's slightly grainy, try stirring vigorously while gently reheating. If it's completely seized and clumpy, unfortunately, it's often beyond saving, and it's best to start over, paying close attention to avoiding water and overheating.
- My shell separated after storing:
- Solution: This is normal! Coconut oil can separate from the chocolate over time, especially if stored in a cooler place. Simply reheat it gently using either the double boiler or microwave method, stirring until it's smooth and re-emulsified.
Storing Your Homemade Magic Shell and Beyond
One of the great advantages of homemade magic shell is its excellent shelf life and versatility:
- Storage: Transfer any leftover magic shell to an airtight glass container with a lid. Store it in a cool, dark place, such as a pantry or cupboard, at room temperature. It will likely solidify into a block, which is perfectly normal. Avoid refrigerating it, as it can make it too hard and difficult to reheat smoothly.
- Shelf Life: Stored properly, your homemade chocolate shell will keep beautifully for up to 3 weeks, and sometimes even longer, depending on the freshness of your ingredients.
- Reusing: When you're ready to use it again, simply reheat the solidified block gently using the double boiler or microwave method until it's liquid and smooth, then let it cool slightly before applying.
- Creative Uses: Don't limit your magic shell to just ice cream! It's fantastic for coating:
- Frozen fruit (strawberries, grapes, banana slices)
- Donuts
- Brownie bites
- Cupcakes (when frosting is firm)
- Pretzels
Conclusion
The allure of the crunchy, satisfying chocolate shell is undeniable, and now you have all the knowledge to recreate that magic in your own kitchen. By understanding the simple science behind coconut oil's unique properties and mastering a few basic techniques, you can whip up batch after batch of this incredible topping. Homemade chocolate shell offers superior flavor, customizable ingredients, and the sheer joy of creating something truly special. So go ahead, experiment with different chocolates and flavorings, and prepare to elevate your desserts to a whole new level of deliciousness. Get ready to experience the true magic of homemade!
